Web」カテゴリーアーカイブ

Web関連技術

AWS (Amazon Lightsail) で Redmine サーバ作成

EC2よりも更に簡易なLightsailで、Redmineサーバを構築してみる。

1. 仮想マシンのデプロイ

WebブラウザでLightsailコンソールを表示する。

「インスタンスの作成」をクリックする。

プラットフォームは「Linux/Unix」を選択(デフォルト)する。

画面を下へスクロールする。

設計図は「Redmine」を選択する。 SSHキーペアは、既にあるものを使う場合は何もしない。新たに作る場合は「SSH キーペアの変更」で作成する。

さらに下へスクロールすると、インスタンスプランの選択画面になる。少人数の利用であれば、デフォルトの512MB 1vCPUのプランでよい。

インスタンス名はわかりやすいものを自分で決める。ここではデフォルトが「Redmine-1」なので、それをそのまま利用した。

「インスタンスの作成」をクリックすると、実際に作成される。画面が切り替わって、 インスタンスがグレーアウトした状態で現れ「保留中」と表示されるので、しばらく待つ。

表示が「実行中」に変わったら、インスタンス名をクリックする。

2. シェルログイン

「SSHを使用して接続」をクリックすると、ブラウザでコンソールを表示できるので、今回はそちらを使ってみる。

※「パブリックIP」に表示されているグローバルIPv4アドレスへ、sshコマンドで接続してもよい。その場合はユーザ名bitnami、sshキーペアはインスタンス作成時に指定したものを使用する。

コンソールで cat bitnami_credentials を実行する。

上記のように、Redmineログイン用のユーザ名とパスワードが表示される。この場合はユーザ名「user」、パスワード「yXenWa2DLcJr」である。

3. Redmine ログイン

Webブラウザで、http://パブリックIP/ にアクセスする。

ログインしていない状態の Redmine が表示される。右上の「ログイン」をクリックする。

さきほどコンソールで表示したユーザ名「user」とパスワードを入力してログインする。

これで、管理者として Redmine にログインした状態となった。あとはブラウザ上から Redmine を操作していく。

4. 初期設定

まずは「Administration」→「Settings」→「Display」タブ→「Default language」を「Japanese(日本語)」に変更、「Save」をクリックする。

次に「Administration」→「Users」へ移動して、新しい管理者ユーザを作成する。*が付いている項目は入力必須である。「Administrator」にはチェックをつけておくこと。

作成出来たら、右上の「Sign out」をクリックしていったんログアウトし、さきほど作成したユーザを使い再ログインする。

ログイン出来たら、元の「user」ユーザを使えないようにしておく。「管理」→「ユーザー」へ移動して、「user」をロックまたは削除する。

AWS (Amazon EC2) で Redmine サーバ作成

課題管理サーバを立てる必要が出てきたので、AWS (EC2) でお手軽に作ってみた。

1.仮想マシンデプロイ

AWS コンソールで EC2 のインスタンス追加画面に行き、AWS Marketplace から検索で「Redmine Certified by Bitnami」を探す。

この AMI を利用して、t1.micro の仮想マシンを作成する。

2. 初回ログイン

sshで仮想マシンにログインする。ユーザ名はbitnami、ssh鍵はデプロイ時に指定したものを使う。

bitnamiユーザのホームディレクトリに “bitnami_credentials”というテキストファイルがあるので、中を閲覧する。Redmine上のユーザ名とパスワードが記載されている。

Welcome to the Bitnami Redmine Stack

******************************************************************************
The default username and password is 'user' and 'TBLwnBpotZT3'.
******************************************************************************

You can also use this password to access the databases and any other component the stack includes.
Please refer to https://docs.bitnami.com/ for more details.

https://RedmineホストのグローバルIPアドレス/ にアクセスして、ユーザ名: user パスワード: 上記テキスト内のパスワード でログインする。

実際に使うユーザを作成してシステム管理者権限を割り当て、そのユーザで再ログインして元々の「user」ユーザを削除する(セキュリティを考慮して)。

3. ホスト名の付与と SSL 証明書の取得

自分の所有ドメインがある場合は、ホスト名を割り当て、Let’s Encryptで証明書を取得することで正規の https サイトにする。

所有ドメインのゾーンファイルに、以下のようなAレコードを追加してリロードする。例示アドレスの 203.0.113.100 は Redmine ホストのグローバル IP アドレスとする。

redmine.example.com.    IN A     203.0.113.100

Redmine サーバに ssh ログインして、/opt/bitnami 以下にインストール済みの letsencrypt クライアント (lego) を利用する。

$ sudo /opt/bitnami/letsencrypt/scripts/generate-certificate.sh -m root@example.com -d redmine.example.com
...
It will create a certificate for the domain "redmine.example.com" under the email "root@example.com"
Do you want to continue? [y/n]: y
...
You can now configure a cronjob to renew it every month.
Do you want to proceed? [y/n]: y

Apache の設定も自動で書き換わるので、これで作業完了でもよいが、httpでアクセスされたらhttpsに転送するようにしておく。

$ sudo vi /opt/bitnami/apache2/conf/bitnami/bitnami.conf

13行目付近に太字の3行を追加
<Directory "/opt/bitnami/apache2/htdocs">
Options Indexes FollowSymLinks
AllowOverride All
RewriteEngine on
RewriteCond %{HTTPS} off
RewriteRule ^(.*)$ https://%{HTTP_HOST}%{REQUEST_URI} [R=301,L]
<IfVersion < 2.3>
Order allow,deny
Allow from all

28行目をコメントアウト
#Include "/opt/bitnami/apache2/conf/bitnami/bitnami-apps-prefix.conf"


$ sudo /etc/init.d/bitnami restart

openssl s_client で SMTP STARTTLS と SMTP AUTH を動作確認する

概要: openssl s_client コマンドについて

telnet コマンドで HTTP や SMTP、POP の接続テストを行うことがあるが、同様に openssl の s_client サブコマンドで、TLS 接続の手動確認をすることが可能だ。例えば、HTTPS の確認は以下のように実行できる。

$ openssl s_client -connect www.example.com:443
(中略)
GET / HTTP/1.0(Enter)
Host: www.example.com(Enter2回押す)

さらに、最初は平文接続して、アプリケーションプロトコル上の STARTTLS コマンドで TLS 状態に入りたい場合もある。SMTP、IMAP、LDAP、FTP などの STARTTLS が相当する。これも s_client サブコマンドの -starttls オプションで実現できる。

mail.example.com サーバの TCPポート 587 (SMTP Submission) で SMTP STARTTLS が使える場合、以下のコマンドで接続が可能となる。-starttls オプションの引数に、smtp をとる。

$ openssl s_client -connect mail.example.com:587 -starttls smtp

ただし、SMTP セッションの中で RCPT TO: を大文字で打った瞬間に、RENEGOTIATING という表示とともに先へ進めなくなってしまうので注意が必要である。

$ openssl s_client -connect mail.example.com:587 -starttls smtp
CONNECTED(00000003)
depth=2 C = JP, O = "SECOM Trust Systems CO.,LTD.", OU = Security Communication RootCA2
verify return:1
depth=1 C = JP, L = Academe, O = National Institute of Informatics, CN = NII Open Domain CA - G4
verify return:1
depth=0 C = JP, L = Academe, O = Example, OU = Example Dept, CN = mail.example.com
verify return:1
(中略)
250 DSN
EHLO mail.example.com
250-mail.example.com
250-PIPELINING
250-SIZE 52428800
250-ETRN
250-AUTH PLAIN LOGIN
250-AUTH=PLAIN LOGIN
250-ENHANCEDSTATUSCODES
250-8BITMIME
250 DSN
MAIL FROM: test@example.com
250 2.1.0 Ok
RCPT TO: test@example.jp
RENEGOTIATING
depth=2 C = JP, O = "SECOM Trust Systems CO.,LTD.", OU = Security Communication RootCA2
verify return:1
depth=1 C = JP, L = Academe, O = National Institute of Informatics, CN = NII Open Domain CA - G4
verify return:1
depth=0 C = JP, L = Academe, O = Example, OU = Example Dept, CN = mail.example.com
verify return:1

標準入力の一文字目が大文字の「R」になっていると、openssl s_client の TLS 再ネゴシエーションコマンドとして解釈されてしまうためである。

再ネゴシエーションを回避するには、先頭の r を小文字で打つか、openssl s_client のオプションとして -ign_eof または -quiet を追加する。

$ openssl s_client -quiet -connect mail.example.com:587 -starttls smtp

SMTP AUTH のテスト

上記の openssl s_client コマンドを用いて、SMTP のセッションを手打ちで再現テストする。さらに SMTP セッションの中で、SMTP AUTH のテストも組み込んでみる。

実行例1: AUTH PLAIN 認証

SMTP AUTH の PLAIN コマンドで必要な文字列は、「ユーザ名\0ユーザ名\0パスワード」(\0はヌル文字)という合成文字列を BASE64 エンコードしたものである。あらかじめ文字列を作っておく。

$ printf 'username\0username\0password' | base64
dXNlcm5hbWUAdXNlcm5hbWUAcGFzc3dvcmQ=

さきほどのエンコード文字列を AUTH PLAIN の引数として与える。

$ openssl s_client -quiet -connect mail.example.com:587 -starttls smtp
depth=2 C = JP, O = "SECOM Trust Systems CO.,LTD.", OU = Security Communication RootCA2
verify return:1
depth=1 C = JP, L = Academe, O = National Institute of Informatics, CN = NII Open Domain CA - G4
verify return:1
depth=0 C = JP, L = Academe, O = Example, OU = Example Dept, CN = mail.example.com
verify return:1
250 DSN
EHLO mail.example.com
250-mail.example.com
250-PIPELINING
250-SIZE 10485760
250-ETRN
250-AUTH PLAIN LOGIN
250-AUTH=PLAIN LOGIN
250-ENHANCEDSTATUSCODES
250-8BITMIME
250 DSN
AUTH PLAIN dXNlcm5hbWUAdXNlcm5hbWUAcGFzc3dvcmQ=
235 2.7.0 Authentication successful ←認証成功
MAIL FROM: test@example.com
250 2.1.0 Ok
RCPT TO: test@example.jp
250 2.1.5 Ok ←メールリレー成功
QUIT
221 2.0.0 Bye

実行例2: AUTH LOGIN 認証

AUTH LOGIN コマンドでは、ユーザ名とパスワードをそれぞれ BASE64 エンコードした文字列が必要になる。

$ printf 'username' | base64
dXNlcm5hbWU=
$ printf 'password' | base64
cGFzc3dvcmQ=

サーバからの 334 VXNlcm5hbWU6 に対してはユーザ名のエンコード文字列を、334 UGFzc3dvcmQ6 に対してはパスワードのエンコード文字列を入力する。

$ openssl s_client -quiet -connect mail.example.com:587 -starttls smtp
depth=2 C = JP, O = "SECOM Trust Systems CO.,LTD.", OU = Security Communication RootCA2
verify return:1
depth=1 C = JP, L = Academe, O = National Institute of Informatics, CN = NII Open Domain CA - G4
verify return:1
depth=0 C = JP, L = Academe, O = Example, OU = Example Dept, CN = mail.example.com
verify return:1
250 DSN
EHLO mail.example.com
250-mail.example.com
250-PIPELINING
250-SIZE 10485760
250-ETRN
250-AUTH PLAIN LOGIN
250-AUTH=PLAIN LOGIN
250-ENHANCEDSTATUSCODES
250-8BITMIME
250 DSN
AUTH LOGIN
334 VXNlcm5hbWU6 ←"Username:" が BASE64 エンコードされている
dXNlcm5hbWU=
334 UGFzc3dvcmQ6 ←"Password:" が BASE64 エンコードされている
cGFzc3dvcmQ=
235 2.7.0 Authentication successful ←認証成功
MAIL FROM: test@example.com
250 2.1.0 Ok
RCPT TO: test@example.jp
250 2.1.5 Ok ←メールリレー成功
QUIT
221 2.0.0 Bye

参考URL:

Ubuntu 18.04 + MariaDB

Ubuntu 標準パッケージの MariaDB を使うにあたってハマりそうな箇所を記述してみる。

DB root ユーザでの接続に失敗する

MariaDB/MySQL データベースを使い始めるときは、まず mysql_secure_installation コマンドで状態を初期化して root パスワードを設定するのが一般的だろう。そして、設定したパスワードを使って DB root 接続し、アプリケーション等に必要なデータベースや DB 一般ユーザを作成する。この手順を実行しようとすると、DB に root ログインできない (パスワード認証が通らない) という事象にぶち当たる。

user@bionic$ sudo mysql_secure_installation (初期化してrootパスワードを設定)
Set root password? [Y/n]y
New password: testpass01
Re-enter new password: testpass01
Remove anonymous users? [Y/n]y
Disallow root login remotely? [Y/n]y
Remove test database and access to it? [Y/n]y
Reload privilege tables now? [Y/n]y

user@bionic$ mysql -u root -p
Enter password: testpass01
ERROR 1698 (28000): Access denied for user 'root'@'localhost' ←認証エラー!

上記動作の原因は、初期状態の DB root ユーザ認証に unix_socket 認証プラグインが使われていることである。この状態では、DB root として接続するために OS の root 権限にならなければならない (sudo または su コマンドを使う)。OS root になっていれば、以下のようにパスワードなしで DB root として接続可能である。

user@bionic:~$ sudo mysql
Welcome to the MariaDB monitor.  Commands end with ; or \g.
Your MariaDB connection id is 35
Server version: 10.1.29-MariaDB-6 Ubuntu 18.04

Copyright (c) 2000, 2017, Oracle, MariaDB Corporation Ab and others.

Type 'help;' or '\h' for help. Type '\c' to clear the current input statement.

MariaDB [(none)]>

DB root でログインすると、認証プラグインの状態も確認できる。

MariaDB [(none)]> SELECT user,host,plugin from mysql.user;
+------+-----------+-------------+
| user | host      | plugin      |
+------+-----------+-------------+
| root | localhost | unix_socket | ← unix_socket 認証プラグインが使われている
+------+-----------+-------------+
1 row in set (0.00 sec)

さて、この認証方式をそのまま使うか?それとも昔ながらのパスワード認証に戻すか?

初期状態の認証設定でそのまま利用する

初期設定に乗っかっていくなら、DB の root パスワードを設定する必要がない。

また一般ユーザでも同一の仕組みを使う場合は、UNIX ユーザと DB ユーザを同名で作成すればよい。

(ただし、この認証方式では外部ホストから TCP/3306 経由でログインできないことになる。必ずローカルの UNIX ドメインソケット経由でなければならない)

以下はブログエンジン WordPress を「wordpress」というユーザ名で利用する場合の例。OS の wordpress ユーザを作り、DB の wordpress ユーザも作成する。

user@bionic:~$ sudo useradd -m -s /bin/bash wordpress
user@bionic:~$ sudo mysql
MariaDB [(none)]> CREATE USER wordpress@localhost IDENTIFIED VIA unix_socket;

wordpress ユーザで接続できるかどうか確認する。

user@bionic:~$ sudo -i -u wordpress
wordpress@bionic:~$ mysql -u wordpress
Welcome to the MariaDB monitor.  Commands end with ; or \g.
Your MariaDB connection id is 57
Server version: 10.1.29-MariaDB-6 Ubuntu 18.04

Copyright (c) 2000, 2017, Oracle, MariaDB Corporation Ab and others.

Type 'help;' or '\h' for help. Type '\c' to clear the current input statement.

MariaDB [(none)]> \q
Bye

このやり方では、WordPress のファイル群を実行する PHP の実行ユーザが wordpress ユーザである必要がある。例えば PHP 実行環境に php-fpm を使っている場合は、/etc/php/7.2/fpm/pool.d/www.confを編集して php-fpm 実行ユーザを wordpress に変更する。

/etc/php/7.2/fpm/pool.d/www.conf 抜粋

user = wordpress
group = wordpress

wordpressデータベースの作成

user@bionic:~$ sudo mysql
MariaDB [(none)]> CREATE DATABASE wordpress;
MariaDB [(none)]> GRANT SELECT,INSERT,UPDATE,DELETE,CREATE,INDEX,ALTER ON wordpress.* TO wordpress@localhost;

wordpress 側の設定 (wp-config.php) では、パスワードを空にしておく。

define('DB_NAME', 'wordpress');
define('DB_USER', 'wordpress');
define('DB_PASSWORD', '');
define('DB_HOST', 'localhost');

従来のパスワード認証を使っていく場合

DB の root ユーザを従来のパスワード認証に変更する (以前の方式に戻す) 。私自身は、こちらの手法で行くことにする。

user@bionic:~$ sudo mysql
MariaDB [(none)]> set password for 'root'@'localhost'=password('testpass02');
MariaDB [(none)]> use mysql;
MariaDB [mysql]> update user set plugin='' where user='root';
MariaDB [mysql]> flush privileges;
MariaDB [mysql]> \q

root ユーザの認証プラグインを外し、通常のパスワードを設定している。

一般ユーザについても、通常のパスワードを設定して作成する。

user@bionic:~$ mysql -u root -p
Enter password: testpass02
MariaDB [(none)]> CREATE USER wordpress@localhost IDENTIFIED BY 'testpass03';

この場合、ログローテートの処理 (/etc/logrotate.d/mysql-server の16行目) にrootパスワードが必要になる。/etc/mysql/debian.cnf の password 行に平文パスワードを記述しておくこと。
user@bionic:~$ sudo vi /etc/mysql/debian.cnf

5行目、10行目
password = testpass02

nginx のモジュール追加リビルド (CentOS 7 EPEL 版)

nginx 公式や epel パッケージの nginx バイナリでは使いたいモジュールがコンパイルされていない。特に nginx-dav-ext-module(WebDAV で OPTIONS メソッドが利用可能になる)、headers-more-nginx-module(HTTPヘッダを追加したり削除したり)、nginx-ct(証明書の透明性対応ができる)を使いたいので、ソースからビルドすることにする。

前提として、使用 OS は CentOS 7 である。

nginx 公式の RPM パッケージもあるが、この記事では epel リポジトリの nginx RPM をベースに、必要なモジュールの記述を追加して SRPM からリビルドしてみる。

1. コンパイルに必要なパッケージをインストール

$ sudo yum install gperftools-devel openssl-devel pcre-devel zlib-devel GeoIP-devel gd-devel perl-devel perl-ExtUtils-Embed libxslt-devel expat-devel git

2. epel リポジトリを追加

epel リポジトリを追加する。追加済みであれば作業の必要なし。
$ sudo yum install epel-release

3. SRPM の入手

SRPM をダウンロード・インストールする。
$ sudo yum install -y yum-utils
$ sudo yum-config-manager --enable epel-testing
$ sudo yum install @buildsys-build
$ yumdownloader --source nginx
$ rpm -ivh nginx-1.20.1-9.el7.src.rpm

今後 yum update で勝手にアップデートされないように、epel レポジトリを無効化しておく。
$ sudo yum-config-manager --disable epel\*

4. カスタマイズ

SRPM の spec ファイルを編集する。
$ vi rpmbuild/SPECS/nginx.spec

以下、nginx.spec に追加する部分を diff -u 形式で記述する。追加する3つのモジュールのうち、nginx-ct は元々 nginx に含まれていて動的モジュール化されている mod-mail と mod-stream に依存するため、これも動的モジュール化する(そうしないとビルドエラーになる)。

--- nginx.spec.orig 2021-10-19 08:55:50.000000000 +0900
+++ nginx.spec 2022-04-28 09:38:22.327765589 +0900
@@ -92,6 +92,8 @@
%endif
BuildRequires: pcre-devel
BuildRequires: zlib-devel
+BuildRequires: expat-devel
+BuildRequires: git

Requires: nginx-filesystem = %{epoch}:%{version}-%{release}
%if 0%{?el7}
@@ -107,6 +109,7 @@

Requires: openssl
Requires: pcre
+Requires: expat
Requires(pre): nginx-filesystem
%if 0%{?with_mailcap_mimetypes}
Requires: nginx-mimetypes
@@ -140,6 +143,7 @@
Requires: nginx-mod-http-xslt-filter = %{epoch}:%{version}-%{release}
Requires: nginx-mod-mail = %{epoch}:%{version}-%{release}
Requires: nginx-mod-stream = %{epoch}:%{version}-%{release}
+Requires: nginx-mod-ct = %{epoch}:%{version}-%{release}

%description all-modules
Meta package that installs all available nginx modules.
@@ -236,12 +240,22 @@
%description mod-devel
%{summary}.

+%package mod-ct
+Summary: Nginx ct modules
+Requires: nginx
+
+%description mod-ct
+%{summary}.
+

%prep
# Combine all keys from upstream into one file
cat %{S:2} %{S:3} %{S:4} > %{_builddir}/%{name}.gpg
%{gpgverify} --keyring='%{_builddir}/%{name}.gpg' --signature='%{SOURCE1}' --data='%{SOURCE0}'
%autosetup -p1
+git clone https://github.com/arut/nginx-dav-ext-module.git
+git clone https://github.com/openresty/headers-more-nginx-module.git
+git clone https://github.com/grahamedgecombe/nginx-ct.git
cp %{SOURCE200} %{SOURCE210} %{SOURCE10} %{SOURCE12} .

%if 0%{?rhel} > 0 && 0%{?rhel} < 8
@@ -322,6 +336,9 @@
--with-stream=dynamic \
--with-stream_ssl_module \
--with-stream_ssl_preread_module \
+ --add-module=./nginx-dav-ext-module \
+ --add-module=./headers-more-nginx-module \
+ --add-dynamic-module=./nginx-ct \
--with-threads \
--with-cc-opt="%{optflags} $(pcre-config --cflags)" \
--with-ld-opt="$nginx_ldopts"; then
@@ -421,6 +438,14 @@
> %{buildroot}%{nginx_moduleconfdir}/mod-mail.conf
echo 'load_module "%{nginx_moduledir}/ngx_stream_module.so";' \
> %{buildroot}%{nginx_moduleconfdir}/mod-stream.conf
+echo 'load_module "%{_libdir}/nginx/modules/ngx_ssl_ct_module.so";' \
+ > %{buildroot}%{_datadir}/nginx/modules/mod-ct.conf
+echo 'load_module "%{_libdir}/nginx/modules/ngx_http_ssl_ct_module.so";' \
+ > %{buildroot}%{_datadir}/nginx/modules/mod-http-ct.conf
+echo 'load_module "%{_libdir}/nginx/modules/ngx_mail_ssl_ct_module.so";' \
+ > %{buildroot}%{_datadir}/nginx/modules/mod-mail_ct.conf
+echo 'load_module "%{_libdir}/nginx/modules/ngx_stream_ssl_ct_module.so";' \
+ > %{buildroot}%{_datadir}/nginx/modules/mod-stream_ct.conf

# Install files for supporting nginx module builds
## Install source files
@@ -479,6 +504,11 @@
/usr/bin/systemctl reload nginx.service >/dev/null 2>&1 || :
fi

+%post mod-ct
+if [ $1 -eq 1 ]; then
+ /usr/bin/systemctl reload nginx.service >/dev/null 2>&1 || :
+fi
+
%preun
%systemd_preun nginx.service

@@ -576,6 +606,16 @@
%{_fileattrsdir}/nginxmods.attr
%{nginx_srcdir}/

+%files mod-ct
+%{_datadir}/nginx/modules/mod-ct.conf
+%{_datadir}/nginx/modules/mod-http-ct.conf
+%{_datadir}/nginx/modules/mod-mail_ct.conf
+%{_datadir}/nginx/modules/mod-stream_ct.conf
+%{_libdir}/nginx/modules/ngx_http_ssl_ct_module.so
+%{_libdir}/nginx/modules/ngx_mail_ssl_ct_module.so
+%{_libdir}/nginx/modules/ngx_ssl_ct_module.so
+%{_libdir}/nginx/modules/ngx_stream_ssl_ct_module.so
+

%changelog
* Mon Oct 18 2021 Felix Kaechele <heffer@fedoraproject.org> - 1:1.20.1-9

5. ビルド、インストール

ビルドを実行する。
$ rpmbuild --with geoip -ba rpmbuild/SPECS/nginx.spec

RPM が出来上がったらインストールする。すでに EPEL や nginx 公式 RPM をインストールしてしまっている場合は、先に削除しておくこと。

既存パッケージの削除:
$ sudo yum erase `rpm -qa | grep nginx`

カスタマイズした RPM のインストール:
$ sudo yum localinstall rpmbuild/RPMS/x86_64/nginx-1.*.rpm rpmbuild/RPMS/x86_64/nginx-mod-*.rpm rpmbuild/RPMS/noarch/nginx-*.rpm

6. 起動

デーモンを起動する。
$ sudo systemctl enable nginx
$ sudo systemctl start nginx

HTTP/2 (ALPN) 対応の nginx を SRPM からビルド

※以下はCentOS 7.3までの古い内容です。CentOS 7.4 では OpenSSL 1.0.2 が標準となったため、以下の作業は不要です。

CentOS7.3 に含まれる標準パッケージの OpenSSL が 1.0.1 系なので、それをリンクしてビルドした nginx 公式のバイナリでは HTTP/2 (ALPN) が利用できない。そこで、openssl-1.0.2 系のソースツリーを使って nginx 公式の SRPM をリビルドすることとする。

ついでに、geoipモジュールとdav_extモジュールも使いたいので、追加した上でビルドする。

1. コンパイルに必要なパッケージをインストール

$ sudo yum install expat-devel pcre-devel zlib-devel GeoIP-devel

2. nginxの公式レポジトリを追加

レポジトリファイルを作成する。
$ sudo vi /etc/yum.repos.d/nginx.repo

[nginx]
name=nginx repo
baseurl=http://nginx.org/packages/centos/$releasever/$basearch/
gpgcheck=0
enabled=1

[nginx-source]
name=nginx repo - Source
baseurl=http://nginx.org/packages/centos/$releasever/SRPMS/
gpgcheck=0
enabled=1

3. ダウンロード

SRPMをダウンロード・インストールする。
$ sudo yum install -y yum-utils
$ yumdownloader --source nginx
$ rpm -ivh --nosignature nginx-1.12.1-1.el7.ngx.src.rpm

今後yum updateで勝手にアップデートされないように、nginxレポジトリを無効化しておく。
$ sudo yum-config-manager --disable nginx
$ sudo yum-config-manager --disable nginx-source

OpenSSL 1.0.2 のソースをダウンロードして展開する。
$ cd /tmp
$ wget https://www.openssl.org/source/openssl-1.0.2l.tar.gz
$ tar xzf openssl-1.0.2l.tar.gz
$ cd ~

OpenSSL のビルドはしなくてよい。

4. カスタマイズ

SRPM の spec ファイルを編集する。
$ vi rpmbuild/SPECS/nginx.spec

青字の部分は追加、赤字で打消し線のところは削除する。

#
%define nginx_home %{_localstatedir}/cache/nginx
%define nginx_user nginx
%define nginx_group nginx
%define nginx_loggroup adm

# distribution specific definitions
%define use_systemd (0%{?fedora} && 0%{?fedora} >= 18) || (0%{?rhel} && 0%{?rhel
} >= 7) || (0%{?suse_version} == 1315)

%if 0%{?rhel} == 5
%define _group System Environment/Daemons
Requires(pre): shadow-utils
Requires: initscripts >= 8.36
Requires(post): chkconfig
Requires: openssl
BuildRequires: openssl-devel
%endif

%if 0%{?rhel} == 6
%define _group System Environment/Daemons
Requires(pre): shadow-utils
Requires: initscripts >= 8.36
Requires(post): chkconfig
Requires: openssl >= 1.0.1
BuildRequires: openssl-devel >= 1.0.1
%endif

%if 0%{?rhel} == 7
%define _group System Environment/Daemons
%define epoch 1
Epoch: %{epoch}
Requires(pre): shadow-utils
Requires: systemd
Requires: openssl >= 1.0.1
BuildRequires: systemd
BuildRequires: openssl-devel >= 1.0.1
BuildRequires: GeoIP-devel
BuildRequires: expat-devel
%endif

%if 0%{?suse_version} == 1315
%define _group Productivity/Networking/Web/Servers
%define nginx_loggroup trusted
Requires(pre): shadow
Requires: systemd
BuildRequires: libopenssl-devel
BuildRequires: systemd
%endif

# end of distribution specific definitions

%define main_version 1.12.1
%define main_release 1%{?dist}.ngx

%define bdir %{_builddir}/%{name}-%{main_version}

%define WITH_CC_OPT $(echo %{optflags} $(pcre-config --cflags)) -fPIC
%define WITH_LD_OPT -Wl,-z,relro -Wl,-z,now -pie
%define BASE_CONFIGURE_ARGS $(echo "--prefix=%{_sysconfdir}/nginx --sbin-path=%{
_sbindir}/nginx --modules-path=%{_libdir}/nginx/modules --conf-path=%{_sysconfdi
r}/nginx/nginx.conf --error-log-path=%{_localstatedir}/log/nginx/error.log --htt
p-log-path=%{_localstatedir}/log/nginx/access.log --pid-path=%{_localstatedir}/r
un/nginx.pid --lock-path=%{_localstatedir}/run/nginx.lock --http-client-body-tem
p-path=%{_localstatedir}/cache/nginx/client_temp --http-proxy-temp-path=%{_local
statedir}/cache/nginx/proxy_temp --http-fastcgi-temp-path=%{_localstatedir}/cach
e/nginx/fastcgi_temp --http-uwsgi-temp-path=%{_localstatedir}/cache/nginx/uwsgi_
temp --http-scgi-temp-path=%{_localstatedir}/cache/nginx/scgi_temp --user=%{ngin
x_user} --group=%{nginx_group} --with-compat --with-file-aio --with-threads --wi
th-http_addition_module --with-http_auth_request_module --with-http_dav_module -
-with-http_flv_module --with-http_gunzip_module --with-http_gzip_static_module -
-with-http_mp4_module --with-http_random_index_module --with-http_realip_module 
--with-http_secure_link_module --with-http_slice_module --with-http_ssl_module -
-with-http_stub_status_module --with-http_sub_module --with-http_v2_module --wit
h-mail --with-mail_ssl_module --with-stream --with-stream_realip_module --with-s
tream_ssl_module --with-stream_ssl_preread_module --with-http_geoip_module --add
-module=./nginx-dav-ext-module --with-openssl=/tmp/openssl-1.0.2l")

Summary: High performance web server
Name: nginx
Version: %{main_version}
Release: %{main_release}
Vendor: Nginx, Inc.
URL: http://nginx.org/
Group: %{_group}

Source0: http://nginx.org/download/%{name}-%{version}.tar.gz
Source1: logrotate
Source2: nginx.init.in
Source3: nginx.sysconf
Source4: nginx.conf
Source5: nginx.vh.default.conf
Source7: nginx-debug.sysconf
Source8: nginx.service
Source9: nginx.upgrade.sh
Source10: nginx.suse.logrotate
Source11: nginx-debug.service
Source12: COPYRIGHT
Source13: nginx.check-reload.sh

License: 2-clause BSD-like license

BuildRoot: %{_tmppath}/%{name}-%{main_version}-%{main_release}-root
BuildRequires: zlib-devel
BuildRequires: pcre-devel

Provides: webserver

%description
nginx [engine x] is an HTTP and reverse proxy server, as well as
a mail proxy server.

%if 0%{?suse_version} == 1315
%debug_package
%endif

%prep
%setup -q
cp %{SOURCE2} .
sed -e 's|%%DEFAULTSTART%%|2 3 4 5|g' -e 's|%%DEFAULTSTOP%%|0 1 6|g' \
    -e 's|%%PROVIDES%%|nginx|g' < %{SOURCE2} > nginx.init
sed -e 's|%%DEFAULTSTART%%||g' -e 's|%%DEFAULTSTOP%%|0 1 2 3 4 5 6|g' \
    -e 's|%%PROVIDES%%|nginx-debug|g' < %{SOURCE2} > nginx-debug.init
git clone https://github.com/arut/nginx-dav-ext-module.git

%build
./configure %{BASE_CONFIGURE_ARGS} \
    --with-cc-opt="%{WITH_CC_OPT}" \
    --with-ld-opt="%{WITH_LD_OPT}" \
    --with-debug --with-openssl-opt="-fPIC"
make %{?_smp_mflags}
%{__mv} %{bdir}/objs/nginx \
    %{bdir}/objs/nginx-debug
./configure %{BASE_CONFIGURE_ARGS} \
    --with-cc-opt="%{WITH_CC_OPT}" \
    --with-ld-opt="%{WITH_LD_OPT}" --with-openssl-opt="-fPIC"
make %{?_smp_mflags}

(以下略)

5. ビルド、インストール

ビルドを実行する。
$ rpmbuild -ba rpmbuild/SPECS/nginx.spec

出来上がったら、RPMをインストールする。
$ sudo yum localinstall rpmbuild/RPMS/x86_64/nginx-1.12.1-1.el7.centos.ngx.x86_64.rpm

展開した openssl ソースを掃除しておく。
$ rm -r /tmp/openssl-1.0.2l

6. 起動

デーモンを起動する。
$ sudo systemctl enable nginx
$ sudo systemctl start nginx

参考URL:
HTTP/2対応nginxのrpmパッケージ作成とインストール

CentOS7でmastodon自分インスタンスを立てる

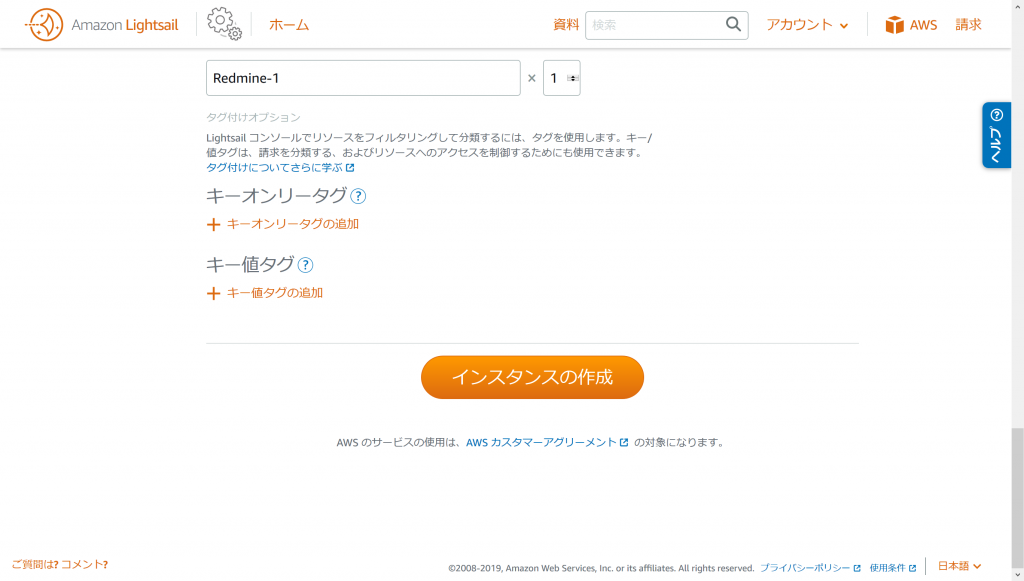
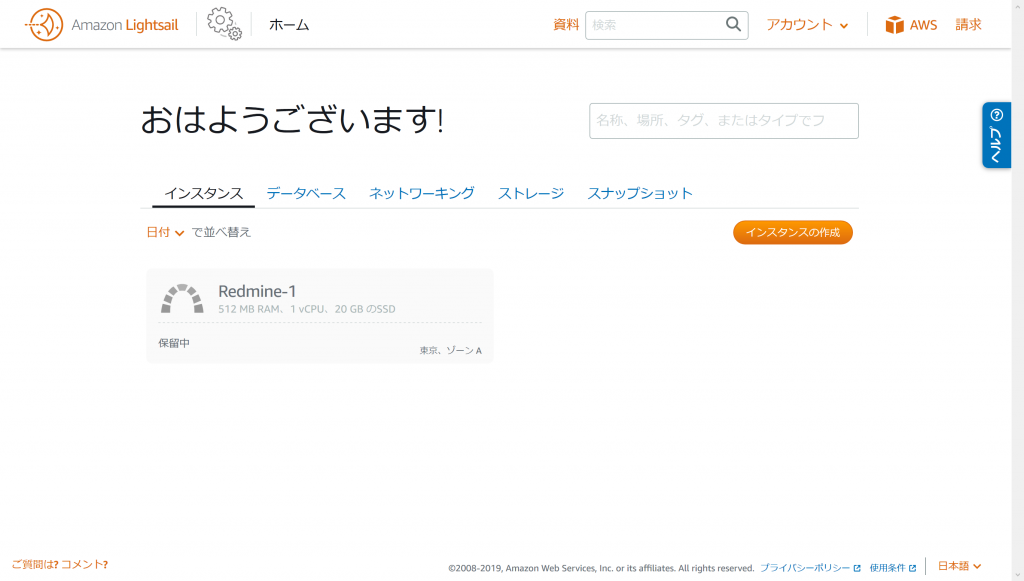
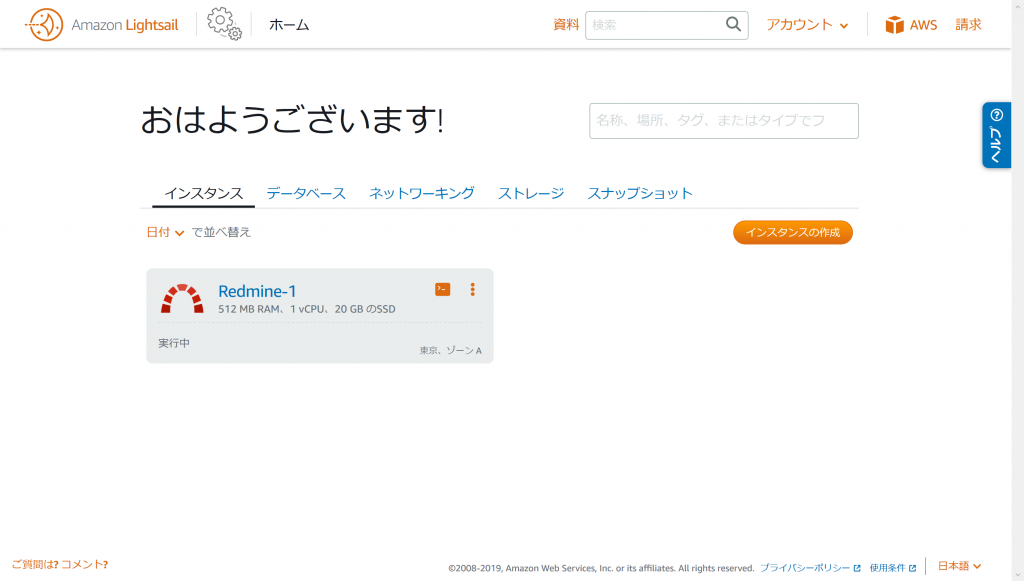
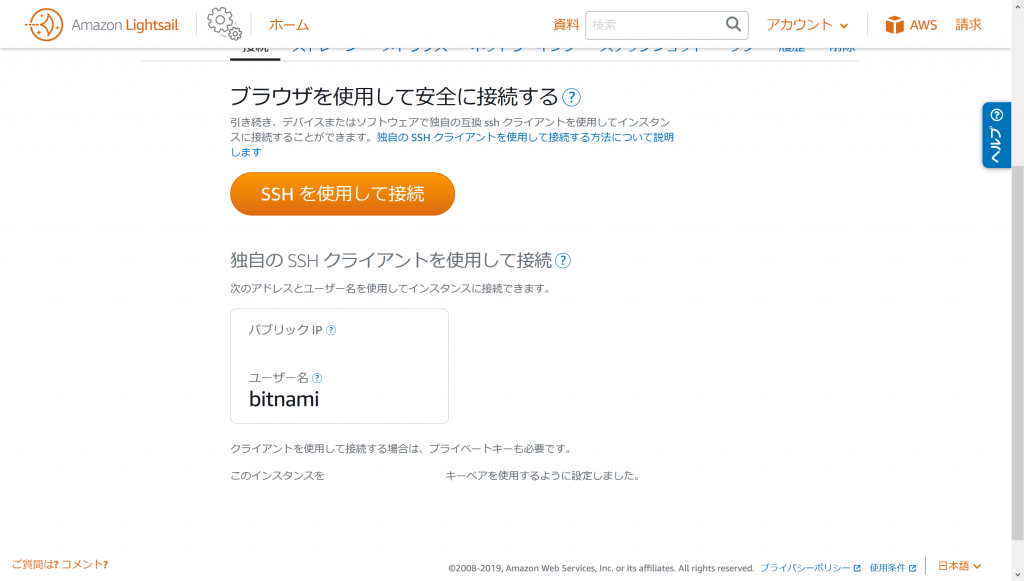
VPS上に自分用のインスタンスを立ててみた。

1. dockerインストール

dockerをパッケージでインストールする。レポジトリとしては、dockerの公式を使う。
$ sudo yum install yum-utils
$ sudo yum-config-manager --add-repo https://download.docker.com/linux/centos/docker-ce.repo
$ sudo yum-config-manager --disable docker-ce-edge
$ sudo yum-config-manager --disable docker-ce-stable

docker-ce-edgeレポジトリで最新のバージョン名を取得してインストールする。
$ yum --enablerepo=docker-ce-edge list docker-ce.x86_64 --showduplicates | sort -r
docker-ce.x86_64 17.05.0.ce-1.el7.centos docker-ce-edge
docker-ce.x86_64 17.04.0.ce-1.el7.centos docker-ce-edge
$ sudo yum --enablerepo=docker-ce-edge install docker-ce-17.05.0.ce-1.el7.centos

dockerデーモンを起動する。
$ sudo systemctl enable docker
$ sudo systemctl start docker

docker-composeをgithubからダウンロードして/usr/bin以下に配置する。
$ sudo -i
# curl -L https://github.com/docker/compose/releases/download/1.12.0/docker-compose-`uname -s`-`uname -m` > /usr/bin/docker-compose
# chmod +x /usr/bin/docker-compose
$ exit

2. mastodon

mastodonのソースツリーを用意する。

最初に、mastodon用の作業用一般ユーザを追加する。
$ sudo useradd mastodon
$ sudo passwd mastodon
$ sudo usermod -aG docker mastodon

mastodonのソースツリーを/home/mastodon/liveに展開する。これ以降はmastodonユーザで作業する。
$ sudo -i -u mastodon
$ git clone https://github.com/tootsuite/mastodon.git live
$ cd live
$ git tag
バージョンタグの一覧が表示されるので、最新のリリースタグを選ぶ。
$ git checkout v1.3.3

ソースツリーに付属している、dockerコンテナの設定ファイル docker-compose.yml を編集する。
$ vi docker-compose.yml

version: '2'
services:

  db:
    restart: always
    image: postgres:alpine
### Uncomment to enable DB persistance
    volumes: ←ここの行頭コメント記号を外す
      - ./postgres:/var/lib/postgresql/data ←ここの行頭コメント記号を外す

  redis:
    restart: always
    image: redis:alpine
### Uncomment to enable REDIS persistance
    volumes: ←ここの行頭コメント記号を外す
      - ./redis:/data ←ここの行頭コメント記号を外す

  web:
    restart: always
    build: .
    image: gargron/mastodon
    env_file: .env.production
    command: bundle exec rails s -p 3000 -b '0.0.0.0'
    ports:
      - "3000:3000"
    links: ←depends_onをlinksに変更する
      - db
      - redis
    volumes:
      - ./public/assets:/mastodon/public/assets
      - ./public/system:/mastodon/public/system

  streaming:
    restart: always
    build: .
    image: gargron/mastodon
    env_file: .env.production
    command: npm run start
    ports:
      - "4000:4000"
    links: ←depends_onをlinksに変更する
      - db
      - redis

  sidekiq:
    restart: always
    build: .
    image: gargron/mastodon
    env_file: .env.production
    command: bundle exec sidekiq -q default -q mailers -q pull -q push
    links: ←depends_onをlinksに変更する
      - db
      - redis
    volumes:
      - ./public/system:/mastodon/public/system

次に、.env.productionを編集する。
$ cp -p .env.production.sample .env.production
$ vi .env.production

以下のような行を編集する。

DB_USER=mastodon ←この後PostgreSQLで設定する
DB_NAME=mastodon ←同上
DB_PASS=password ←同上
LOCAL_DOMAIN=mastodon.example.com ←mastodonサーバのFQDN
SMTP_SERVER=mail.example.com ←メールサーバのホスト名
SMTP_PORT=587 ←メールサーバのポート SMTP AUTHが使えるポートを指定
SMTP_LOGIN=mastodon ←SMTP AUTHのユーザ名
SMTP_PASSWORD=password ←SMTP AUTHのパスワード
SMTP_FROM_ADDRESS=postmaster@example.com

dockerコンテナをダウンロードし、ビルドする。ここは時間がかかる。
$ docker-compose build

次に、同じコマンドを3回実行してキーを作成する。
$ docker-compose run --rm web rake secret
3d3748d778c215f269c18c4c46dc2fb94da50ec569b2bc0c593353b5f54f2f4b6e4307978bc0304042f8d086716f1896046751d4b0fc8b9420a79c33454caa81
$ docker-compose run --rm web rake secret
5377ae140e0c1eaf857b5423067c4295029c9cdb23feefa9f382c7aa94753f224ed097834f15447c419d31065ce0dc816ef6efeec594de8996b776910b2e3326
$ docker-compose run --rm web rake secret
772fab57e3e71fa6c57f14e8ab42e986daf0aaf67a1ebe469d04fc3187f989ec77bd8bebdc08b62c4a456e8851755140000286c8babc1b8e4c9203782aadd6f2

出力された鍵文字列を、.env.production設定ファイルに記述する。
$ vi .env.production

PAPERCLIP_SECRET=3d3748d778c215f269c18c4c46dc2fb94da50ec569b2bc0c593353b5f54f2f4b6e4307978bc0304042f8d086716f1896046751d4b0fc8b9420a79c33454caa81
SECRET_KEY_BASE=5377ae140e0c1eaf857b5423067c4295029c9cdb23feefa9f382c7aa94753f224ed097834f15447c419d31065ce0dc816ef6efeec594de8996b776910b2e3326
OTP_SECRET=772fab57e3e71fa6c57f14e8ab42e986daf0aaf67a1ebe469d04fc3187f989ec77bd8bebdc08b62c4a456e8851755140000286c8babc1b8e4c9203782aadd6f2

コンテナを起動する。
$ docker-compose up -d

dbコンテナ内のPostgreSQLに、ユーザとデータベースを作成する。
$ docker exec -it live_db_1 bash
# su - postgres
43e296a2871c:~$ createuser -P mastodon
Enter password for new role: password
Enter it again: password
43e296a2871c:~$ createdb mastodon -O mastodon
43e296a2871c:~$ exit
# exit

dbコンテナの変更部分をアップデートする。また、assetsファイル(静的コンテンツ)を生成する。
$ docker-compose run --rm web rails db:migrate
$ docker-compose run --rm web rails assets:precompile

いったんコンテナを再起動する。
$ docker-compose stop
$ docker-compose up -d

3. certbot (letsencrypt)

Let’s EncryptプロジェクトCAに、証明書を発行してもらう。

certbotソースツリーを、/opt以下に展開してcertbot-autoを実行する。
$ sudo -i
# cd /opt
# chgrp wheel .
# chmod g+w .
# exit
$ cd /opt
$ git clone https://github.com/certbot/certbot
$ cd certbot
$ ./certbot-auto certonly -n --standalone --agree-tos -m 管理者メールアドレス -d www.example.com,mail.example.com,mastodon.example.com

今回は直接関係ないが、-dオプションで SubjectAltNameを指定することで、他のバーチャルホストと証明書を共用する。

4. nginx のインストールと設定

nginxはpuma+railsのリバースプロキシ兼、静的コンテンツを自前で返すWebサーバとなる。

nginx のインストール用 repo を追加する。
$ sudo vi /etc/yum.repos.d/nginx.repo

[nginx]
name=nginx repo
baseurl=http://nginx.org/packages/centos/$releasever/$basearch/
gpgcheck=0
enabled=0

nginxをインストールする。
$ sudo yum --enablerepo=nginx install nginx

nginxの設定
$ sudo vi /etc/nginx/conf.d/mastodon.conf

map $http_upgrade $connection_upgrade {
  default upgrade;
  ''      close;
}

server {
  listen 80;
  listen [::]:80;
  server_name mastodon.example.com;
  location / { return 301 https://$host$request_uri; }
}

server {
  listen 443 ssl;
  listen [::]:443 ssl;
  server_name mastodon.example.com;

  ssl_protocols TLSv1.2;
  ssl_ciphers EECDH+AESGCM:EECDH+AES;
  ssl_ecdh_curve prime256v1;
  ssl_prefer_server_ciphers on;
  ssl_session_cache shared:SSL:10m;

  ssl_certificate     /etc/letsencrypt/live/example.com/fullchain.pem;
  ssl_certificate_key /etc/letsencrypt/live/example.com/privkey.pem;
  ssl_dhparam         /etc/pki/tls/dhparam.pem;

  keepalive_timeout    70;
  sendfile             on;
  client_max_body_size 0;

  root /home/mastodon/live/public;

  gzip on;
  gzip_disable "msie6";
  gzip_vary on;
  gzip_proxied any;
  gzip_comp_level 6;
  gzip_buffers 16 8k;
  gzip_http_version 1.1;
  gzip_types text/plain text/css application/json application/javascript text/xml application/xml application/xml+rss text/javascript;

  add_header Strict-Transport-Security "max-age=31536000";

  location / {
    try_files $uri @proxy;
  }

  location /assets {
    add_header Cache-Control "public, max-age=31536000, immutable";
  }

  location @proxy {
    proxy_set_header Host $host;
    proxy_set_header X-Real-IP $remote_addr;
    proxy_set_header X-Forwarded-For $proxy_add_x_forwarded_for;
    proxy_set_header X-Forwarded-Proto https;
    proxy_set_header Proxy "";
    proxy_pass_header Server;

    proxy_pass http://127.0.0.1:3000;
    proxy_buffering off;
    proxy_redirect off;
    proxy_http_version 1.1;
    proxy_set_header Upgrade $http_upgrade;
    proxy_set_header Connection $connection_upgrade;

    tcp_nodelay on;
  }

  location /api/v1/streaming {
    proxy_set_header Host $host;
    proxy_set_header X-Real-IP $remote_addr;
    proxy_set_header X-Forwarded-For $proxy_add_x_forwarded_for;
    proxy_set_header X-Forwarded-Proto https;
    proxy_set_header Proxy "";

    proxy_pass http://localhost:4000;
    proxy_buffering off;
    proxy_redirect off;
    proxy_http_version 1.1;
    proxy_set_header Upgrade $http_upgrade;
    proxy_set_header Connection $connection_upgrade;

    tcp_nodelay on;
  }

  error_page 500 501 502 503 504 /500.html;
}

nginxを起動する。
$ sudo openssl dhparam 2048 -out /etc/pki/tls/dhparam.pem
$ sudo systemctl enable nginx
$ sudo systemctl restart nginx

5. 起動後の設定

mastodonの画面にWebブラウザでアクセスし、最初のユーザを作成する。

mastodon上の最初のユーザを作成してから、以下のコマンドで管理者ユーザ化する
$ docker-compose run --rm web rails mastodon:make_admin USERNAME=firstusername

さらにシングルユーザーモード化して、ほかのユーザではアクセスできなくする
$ vi .env.production
SINGLE_USER_MODE=true

設定を反映するため、再起動する。
$ docker-compose stop
$ docker-compose up -d

systemd起動スクリプトを作成して、VPSを再起動したときも自動でmastodon用コンテナが起動するようにする。
$ sudo vi /etc/systemd/system/mastodon.service

[Unit]
Description=Mastodon
Requires=docker.service
After=network.target
After=docker.service

[Service]
Type=simple
User=mastodon
Group=mastodon
WorkingDirectory=/home/mastodon/live
ExecStart=/usr/bin/docker-compose up
ExecStop=/usr/bin/docker-compose stop

[Install]
WantedBy=multi-user.target

systemctlを使ってmastodonコンテナを再起動してみる。
$ sudo systemctl enable mastodon
$ sudo systemctl stop mastodon
$ sudo systemctl start mastodon

以上で完了である。

Ubuntu 16.04 + MariaDB

※これは古い記事です。Ubuntu 18.04 の場合はこちら

※以下のサイトを参考に全面改訂しました(2017/09/12)
Ubunt 16.04でMariaDBをインストールするとパスワードが変

MySQL から MariaDB に移行するにあたって、パッケージが前提とする流儀が違ったり、罠があったりするので手当てをする。

1. DB root ユーザでの接続に失敗する

通常は最初に DB root ユーザで DB エンジンに接続して、Web アプリケーションの要求するデータベースやDBユーザを作成するだろう。これを実行しようとすると、OS の一般ユーザのコマンドラインから DB に root ログインできないという事象にぶち当たる。

user@xenial:~$ mysql -u root -p
Enter password:
ERROR 1698 (28000): Access denied for user 'root'@'localhost'

mysql_secure_installationで初期化を実行しても効果がない。

上記動作の原因は、初期状態の DB root ユーザ認証に UNIX ソケット認証プラグインが使われているためである。この状態では、DB root として接続するために OS root 権限にならなければならない (sudo または su コマンドを使う)。OS root になっていれば、以下のようにユーザ名指定なし・パスワードなしで DB root として接続可能である。

user@xenial:~$ sudo mysql
Welcome to the MariaDB monitor.  Commands end with ; or \g.
Your MariaDB connection id is 42
Server version: 10.0.34-MariaDB-0ubuntu0.16.04.1 Ubuntu 16.04

Copyright (c) 2000, 2018, Oracle, MariaDB Corporation Ab and others.

Type 'help;' or '\h' for help. Type '\c' to clear the current input statement.

MariaDB [(none)]>

DB root でログインすると、認証プラグインの状態も確認できる。

MariaDB [(none)]> SELECT user,host,plugin from mysql.user;
+------+-----------+-------------+
| user | host      | plugin      |
+------+-----------+-------------+
| root | localhost | unix_socket | ←unix_socket認証プラグインが使われている
+------+-----------+-------------+
1 row in set (0.00 sec)

2. 初期状態の認証設定でそのまま利用する

この初期設定に乗っかっていくなら、DB の root パスワードを設定する必要がない。

また一般ユーザでも同一の仕組みを使う場合は、UNIX ユーザと DB ユーザを同名で作成すればよい。

例) wordpress を「wordpress」というユーザ名で利用する場合

user@xenial:~$ sudo useradd -m -s /bin/bash wordpress (OS ユーザの作成)
user@xenial:~$ sudo mysql
MariaDB [(none)]> CREATE USER wordpress@localhost IDENTIFIED VIA unix_socket; (DB ユーザの作成)

wordpress ユーザで接続できるかどうか確認する。

user@xenial:~$ sudo -i -u wordpress
wordpress@xenial:~$ mysql -u wordpress
Welcome to the MariaDB monitor.  Commands end with ; or \g.
Your MariaDB connection id is 46
Server version: 10.0.34-MariaDB-0ubuntu0.16.04.1 Ubuntu 16.04

Copyright (c) 2000, 2018, Oracle, MariaDB Corporation Ab and others.

Type 'help;' or '\h' for help. Type '\c' to clear the current input statement.

MariaDB [(none)]> \q
Bye

※上記の方式でwordpressを動かす場合は、PHP の実行ユーザが wordpress ユーザである必要がある。例えば PHP 実行環境に php-fpm を使っている場合は、/etc/php/7.0/fpm/pool.d/www.confを編集して php-fpm 実行ユーザを wordpress に変更する。

※この認証方式では、TCP/3306 経由ではログインできないことになる。必ずローカルの UNIX ドメインソケット経由でなければならない。

3. 従来のパスワード認証を使っていく場合

DB の root ユーザを従来のパスワード認証に変更したい (以前の方式に戻す) 場合は、以下の手順を実行する。

user@xenial:~$ sudo mysql
MariaDB [(none)]> set password for 'root'@'localhost'=password('パスワード文字列');
MariaDB [(none)]> use mysql;
MariaDB [mysql]> update user set plugin='' where user='root';
MariaDB [mysql]> flush privileges;
MariaDB [mysql]> \q

root ユーザの認証プラグインを外し、通常のパスワードを設定している。この対処を実施した場合は、/etc/mysql/debian.cnf に平文パスワードを記述してやらないと systemctl での起動・停止が動作しなくなる。

user@xenial:~$ sudo vi /etc/mysql/debian.cnf
[client]
host     = localhost
user     = root
password = rootのパスワード文字列
socket   = /var/run/mysqld/mysqld.sock
[mysql_upgrade]
host     = localhost
user     = root
password = rootのパスワード文字列
socket   = /var/run/mysqld/mysqld.sock

一般ユーザについても、通常のパスワードを設定して作成する。

MariaDB [(none)]> CREATE USER wordpress@localhost IDENTIFIED BY 'パスワード文字列';

4. localhost の 3306/tcp に接続できない

アプリケーションから localhost あてに接続すると、システム上 IPv6 (::1) が優先される。しかし MariaDB デフォルト設定の bind-address は 127.0.0.1 になっている。

このせいで、アプリケーションの設定で、DB サーバのホスト名 / IP アドレス指定を “localhost” にしてあると接続できない。アプリケーション側での DB サーバ指定を 127.0.0.1 とするか、MariaDB 側の設定ファイル /etc/mysql/mariadb.conf.d/50-server.cnf で bind-address を ::1 にする必要がある。

Ubuntu 14.04 + nginx で HTTP/2 サーバ

※以下は Ubuntu 14.04 用の内容です。Ubuntu 16.04 であれば、標準パッケージでHTTP/2が使えて、様々な機能が追加された nginx-extras が利用可能です。そちらを使いましょう。

nginx公式で配布されているmainlineバイナリを使えばHTTP/2は利用できるのだが、nginx-dav-ext-moduleが同時にコンパイルされておらずWebDAVが使い物にならないため、リビルドを実行する。

1. ビルド環境を準備する

開発環境をインストールする。

sudo apt-get install build-essential debhelper

nginxのビルドに必要なライブラリ・ヘッダをインストールする。

sudo apt-get install libpcre3-dev libxml2-dev libxslt1-dev libgd-dev libssl-dev libgeoip-dev

2. nginx公式のパッケージをapt-getで利用できるようにする

apt sourceとして登録する。

curl http://nginx.org/keys/nginx_signing.key | sudo apt-key add -
sudo vi /etc/apt/sources.list.d/nginx.list

/etc/apt/sources.list.d/nginx.listファイル:

deb http://nginx.org/packages/mainline/ubuntu/ trusty nginx
deb-src http://nginx.org/packages/mainline/ubuntu/ trusty nginx

3. ソースパッケージを取得してビルドする

sudo apt-get update
apt-get source nginx
cd nginx-1.9.12
git clone https://github.com/arut/nginx-dav-ext-module.git
vi debian/rules

nginx-1.9.12/debian/rulesファイル:

    --add-module=./nginx-dav-ext-module \ この行を追加

実際にビルドする。

dpkg-buildpackage -us -uc -b -d
cd ..

4. ビルドしたパッケージをapt-getでインストールする

ローカルのdebレポジトリを作成する。

sudo mkdir -p /usr/src/deb
sudo mv *.deb /usr/src/deb/
sudo bash
# cd /usr/src/deb
# apt-ftparchive packages . | gzip -c9 > Packages.gz
# apt-ftparchive sources . | gzip -c9 > Sources.gz
# exit
sudo vi /etc/apt/sources.list.d/local.list

/etc/apt/sources.list.d/local.listファイル:

deb file:/usr/src/deb/ ./

インストールを実行する。

sudo apt-get update
sudo apt-get install nginx

参考URL:
Ubuntu (Debian) で nginx に WebDAV拡張モジュール(ngx-dav-ext-module)を組み込むで使ってみる
Nginx で WebDAV 環境構築、PROPFIND 405 が使えなかったのでソースからコンパイルしてみた
ローカルに置いたdebファイルをapt-get installでインストールする
Nginxセキュリティ設定
Ubuntu+php5-fpm+mysql で LEMP 環境に WordPress をインストール
Let’s EncryptとnginxでHTTP/2サーバを立てる

Ubuntu 12.04 から 14.04 に移行

Apache HTTPd が 2.2 から 2.4 になっているため、書式が変わったりする。
またデフォルト設定が少し違う。

1. アクセス制御設定

allow deny などは require に書き換えが必要 (2.4の仕様変更)
例えば Allow from all は Require all grantedに。
参考URL: Upgrading to 2.4 from 2.2
http://httpd.apache.org/docs/2.4/upgrading.html

2. サイト設定ファイルの名前

/etc/apache2/sites-available の下のサイト個別設定ファイルは .conf というサフィックスを付けないと読み込まれない。

3. AuthGroupFile

mod_authz_groupfileがデフォルトでロードされていないので、AuthGroupFileが書いてあるとエラーになる。AuthGroupFileの記述をやめるか、モジュールをロードすることで解決する。

4. NFSマウントの見え方

あと、df コマンドでマウント中のファイルシステムを表示させると、同じ NFS サーバからのエクスポートツリーを複数マウントしている場合に一つしか表示されないようになった。

$ cat /etc/fstab    ←NFS4の設定が2行書いてある
nfsserver:/vmware	/home/vmware	nfs4	defaults	0	0
nfsserver:/iso	/home/iso	nfs4	defaults	0	0
$ df -h -t nfs4    ←1行しか表示されない
Filesystem      Size  Used Avail Use% Mounted on
nfsserver:/iso   1.8T  867G  967G  48% /home/iso

マウント自体は問題なく出来ているので、こういう仕様らしいとあきらめる。