個人的なことだが、自宅のフレッツ回線とプロバイダがIPv6ネイティブ方式 (IPoE) に対応したため、自宅内のノードに IPv6 グローバルアドレスを割り当てられるようになった。
これを利用して、自分で借りた「さくらの VPS」(こちらも IPv6 グローバルアドレスが付与される)と自宅内サーバの間に IPv6 IPsecトンネルを作成してみる。
前提環境:
・自宅サーバ: Raspbian 9.4 + strongswan
・VPS: CentOS 7.5 + strongswan
・認証方式: X.509 証明書
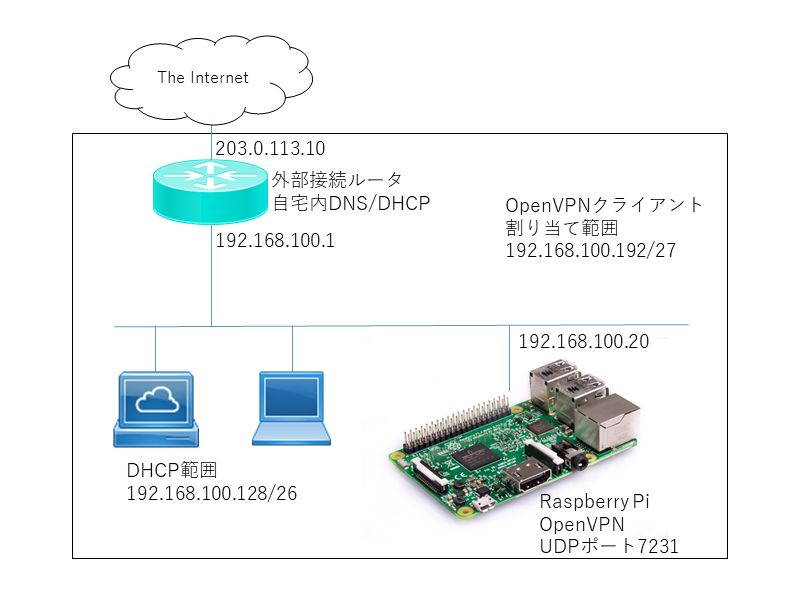
ネットワーク構成図

1. 証明書の作成
myserver1 上に CA のためのディレクトリと設定を準備する。
user@myserver1:~$ sudo mkdir /etc/ssl/CA

user@myserver1:~$ sudo mkdir /etc/ssl/newcerts

user@myserver1:~$ sudo sh -c "echo '01' > /etc/ssl/CA/serial"

user@myserver1:~$ sudo sh -c "echo '01' > /etc/ssl/CA/crlnumber"

user@myserver1:~$ sudo touch /etc/ssl/CA/index.txt

user@myserver1:~$ sudo vi /etc/ssl/openssl.cnf
/etc/ssl/openssl.cnfの抜粋:
dir		= /etc/ssl		# Where everything is kept
database	= $dir/CA/index.txt	# database index file.
certificate	= $dir/certs/ca1.crt 	# The CA certificate
serial		= $dir/CA/serial 		# The current serial number
crlnumber	= $dir/CA/crlnumber # the current crl number
                    # must be commented out to leave a V1 CRL
crl     = $dir/crl/crl.pem
private_key	= $dir/private/ca1.key
CA 鍵・証明書を作成する。
user@myserver1:~$ sudo openssl req -new -x509 -extensions v3_ca -keyout /etc/ssl/private/ca1.key -out /etc/ssl/certs/ca1.crt -days 3652

(snip)

Country Name (2 letter code) [AU]:JP

State or Province Name (full name) [Some-State]:Aichi

Locality Name (eg, city) []:Nagoya

Organization Name (eg, company) [Internet Widgits Pty Ltd]:Home

Organizational Unit Name (eg, section) []:CA

Common Name (e.g. server FQDN or YOUR name) []:ca1.home.example.com

Email Address []:
myserver1 の秘密鍵を作成する。
user@myserver1:~$ openssl genrsa -aes256 -out /etc/ssl/private/myserver1.key 2048

Enter pass phrase for myserver1.key:********

(後でパスワードを削除するので、パスワードはここでは適当に決める)

Verifying - Enter pass phrase for myserver1.key:********
秘密鍵ファイルのパスワードを削除しておく。
user@myserver1:~$ openssl rsa -in /etc/ssl/private/myserver1.key -out /etc/ssl/private/myserver1.key

Enter pass phrase for myserver1.key:********

writing RSA key
myserver1 の CSR を作成する。
user@myserver1:~$ openssl req -new -days 1826 -key /etc/ssl/private/myserver1.key -out /etc/ssl/cert/myserver1.csr

(snip)

Country Name (2 letter code) [AU]:JP

State or Province Name (full name) [Some-State]:Aichi

Locality Name (eg, city) []:Nagoya

Organization Name (eg, company) [Internet Widgits Pty Ltd]:Home

Organizational Unit Name (eg, section) []:Server

Common Name (e.g. server FQDN or YOUR name) []:myserver1.home.example.com

Email Address []:

Please enter the following 'extra' attributes

to be sent with your certificate request

A challenge password []:

An optional company name []:
CA 鍵を使って CSR に署名する。
user@myserver1:~$ sudo openssl ca -in /etc/ssl/cert/myserver1.csr -config /etc/ssl/openssl.cnf

Enter pass phrase for /etc/ssl/private/ca.key:********

(snip)

Sign the certificate? [y/n]:y

1 out of 1 certificate requests certified, commit? [y/n]y

(snip)

Data Base Updated
CA 証明書とホスト証明書・鍵を strongswan 用に配置する。
user@myserver1:~$ sudo cp /etc/ssl/certs/ca1.crt /etc/ipsec.d/cacerts/

user@myserver1:~$ sudo cp /etc/ssl/newcerts/01.pem /etc/ipsec.d/certs/myserver1.crt

user@myserver1:~$ sudo cp /etc/ssl/private/myserver1.key /etc/ipsec.d/private/
myvps1 用の証明書も同様に作成する。
user@myserver1:~$ openssl genrsa -aes256 -out /etc/ssl/private/myvps1.key 2048

user@myserver1:~$ openssl rsa -in /etc/ssl/private/myvps1.key -out /etc/ssl/private/myvps1.key

user@myserver1:~$ openssl req -new -days 1826 -key /etc/ssl/private/myvps1.key -out /etc/ssl/cert/myvps1.csr

user@myserver1:~$ sudo openssl ca -in /etc/ssl/cert/myvps1.csr -config /etc/ssl/openssl.cnf
いま作成した myvps1 用のホスト証明書・鍵、CA証明書を myvps1 側にコピーする。
user@myserver1:~$ cp /etc/ssl/certs/ca1.crt .

user@myserver1:~$ cp /etc/ssl/newcerts/02.pem ./myvps1.crt

user@myserver1:~$ sudo cp /etc/ssl/private/myvps1.key .

user@myserver1:~$ sudo chown user myvps1.key

user@myserver1:~$ scp ca1.crt myvps1.crt myvps1.key myvps1:
myvps1 上で証明書・鍵を配置する。
[user@myvps1 ~]$ sudo cp ca1.crt /etc/strongswan/ipsec.d/cacerts/

[user@myvps1 ~]$ sudo cp myvps1.crt /etc/strongswan/ipsec.d/certs/

[user@myvps1 ~]$ sudo cp myvps1.key /etc/strongswan/ipsec.d/private/
作業用ファイルを削除する。
[user@myvps1 ~]$ rm ca1.crt myvps1.crt myvps1.key

user@myserver1:~$ rm ca1.crt myvps1.crt myvps1.key
2. VPS 側の IPsec 設定
strongswan をインストールする。
[user@myvps1 ~]$ sudo yum install epel-release

[user@myvps1 ~]$ sudo yum install strongswan
カーネルモジュールをロードする。
strongswan公式ドキュメントを参照して、必要なモジュールがロードされていない場合は手動でロードする。
[user@myvps1 ~]$ sudo modprobe xfrm6_tunnel
設定ファイルを編集する。
[user@myvps1 ~]$ vi /etc/strongswan/ipsec.conf
conn myhome-to-vps6
        authby=rsasig
        auto=add
        closeaction=clear
        dpdaction=clear
        leftid="C=JP, ST=Aichi, O=Home, OU=Server, CN=myvps1.example.com"
        leftsubnet=2001:db8:abcd:efab:cdef:abcd:efab:cdef/128
        leftcert=myvps1.crt
        right=%any
        rightid="C=JP, ST=Aichi, O=Home, OU=Server, CN=myserver1.home.example.com"
        rightsubnet=2001:db8:1234:5678::/64
        ike=aes256-sha512-modp8192!
        esp=aes256-sha512
[user@myvps1 ~]$ sudo vi /etc/strongswan/ipsec.secrets
: RSA myvps1.key
strongswanサービス起動
[user@myvps1 ~]$ sudo systemctl enable strongswan

[user@myvps1 ~]$ sudo systemctl start strongswan
3. 自宅内サーバ側の設定
strongswanをインストールする。こちらは Raspbian なので apt コマンドで。
user@myserver1:~$ sudo apt install strongswan
必要なカーネルモジュールをロードする。
user@myserver1:~$ sudo modprobe xfrm6_tunnel

user@myserver1:~$ sudo modprobe esp6
設定ファイルを編集する。
user@myserver1:~$ sudo vi /etc/ipsec.conf
conn myhome-to-vps6
        authby=rsasig
        auto=start
        closeaction=restart
        dpdaction=restart
        leftid="C=JP, ST=Aichi, O=Home, OU=Server, CN=myserver1.home.example.com"
        leftsubnet=2001:db8:1234:5678::/64
        leftcert=myserver1.crt
        right=2001:db8:abcd:efab:cdef:abcd:efab:cdef
        rightid="C=JP, ST=Aichi, O=Home, OU=Server, CN=myvps1.example.com"
        rightsubnet=2001:db8:abcd:efab:cdef:abcd:efab:cdef/128
        ike=aes256-sha512-modp8192!
        esp=aes256-sha512
user@myserver1:~$ sudo vi /etc/ipsec.secrets
: RSA myserver1.key
strongswanサービスを起動する。
user@myserver1:~$ sudo systemctl enable strongswan

user@myserver1:~$ sudo systemctl start strongswan